LinearLayout
- 선형으로 배치
- LinearLayout은 뷰를 가로나 세로 방향으로 나열하는 레이아웃
- orientation 속성에 horizontal이나 vertical값으로 방향을 지정
- layout_weight 속성 : 여백을 채움
▶뷰 1개로 전체 여백을 채움.
android:layout_weight="1" ==> 100%라는 의미
▶여러 개로 여백을 나누어 채우기
layout_weight 속성에 지정한 숫자는 가중치
layout_weight값을 각각 1과 3으로 선언했다면 가로 여백을 각각 1/4만큼, 3/4만큼 나누어 차지
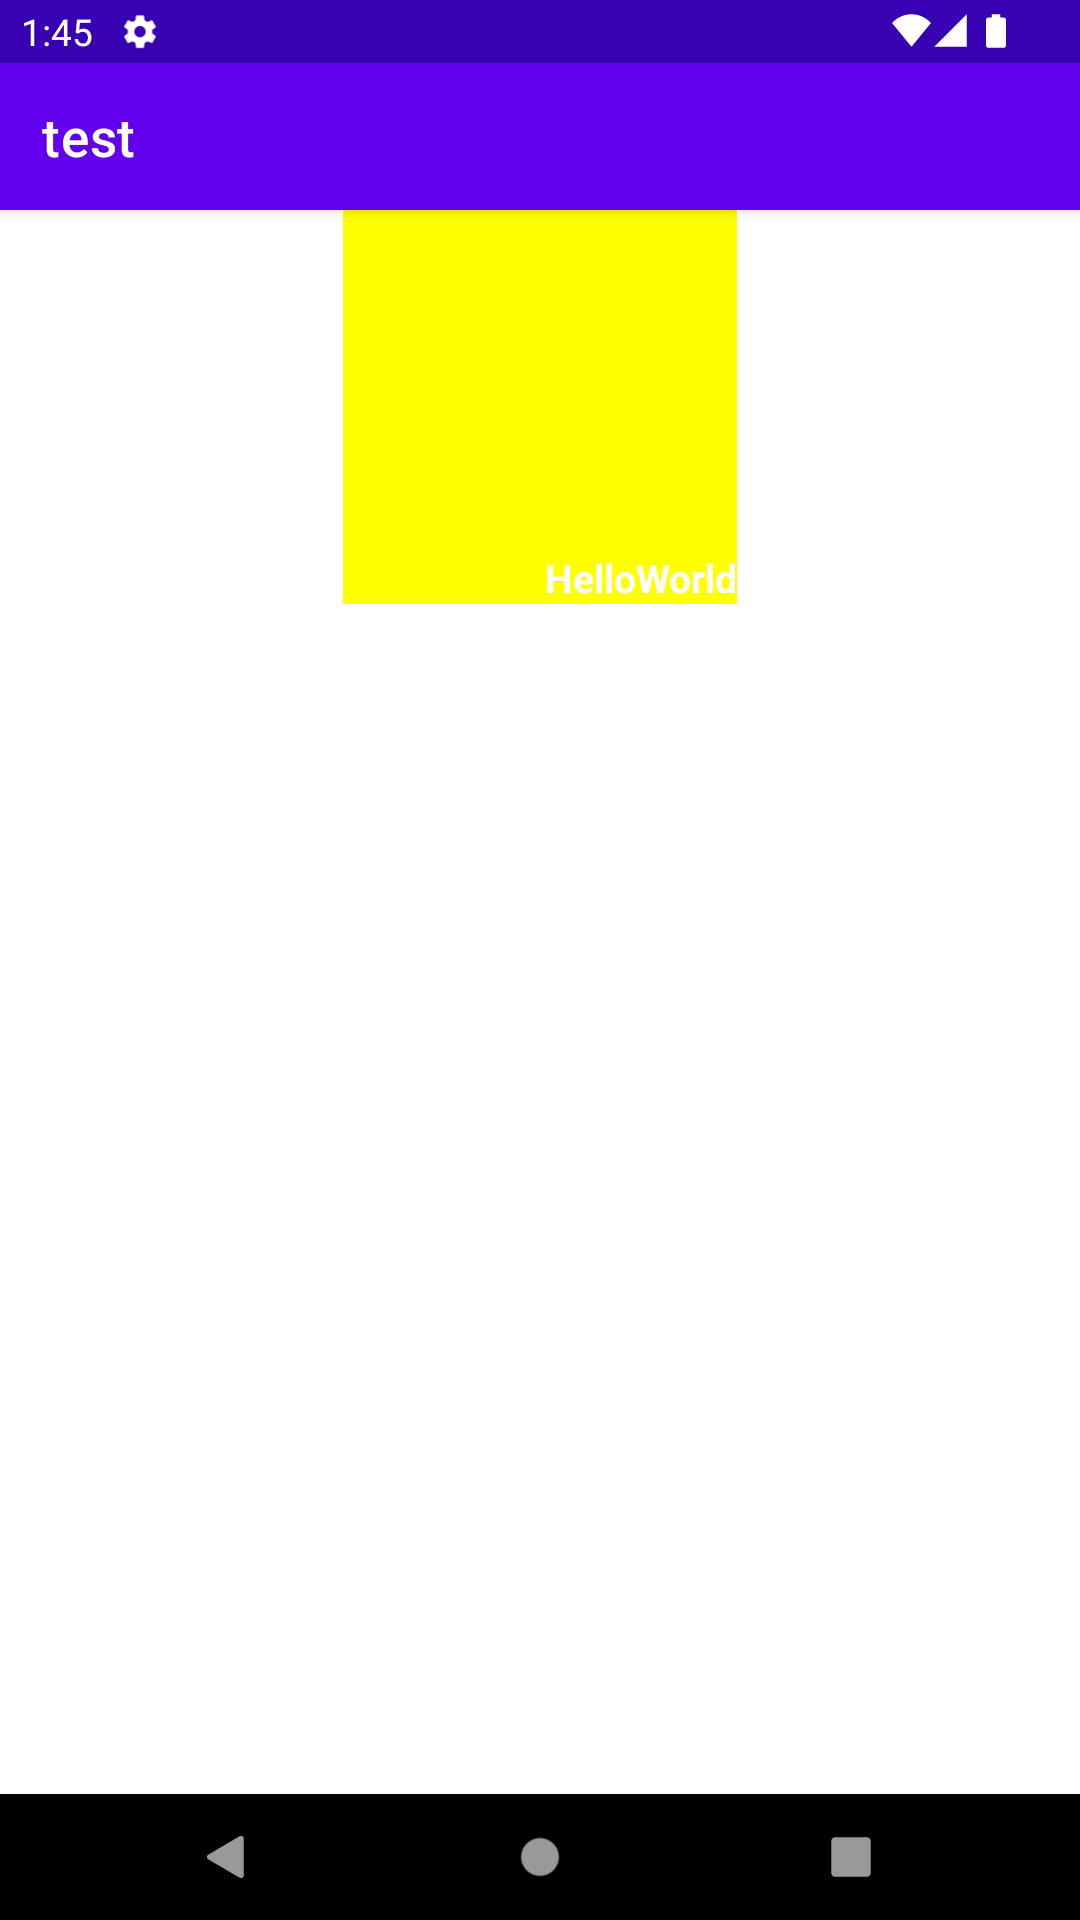
- gravity, layout_gravity 속성
▶뷰를 정렬
▶gravity 속성의 정렬 대상은 콘텐츠
▶layout_gravity는 뷰 자체를 정렬하는 속성
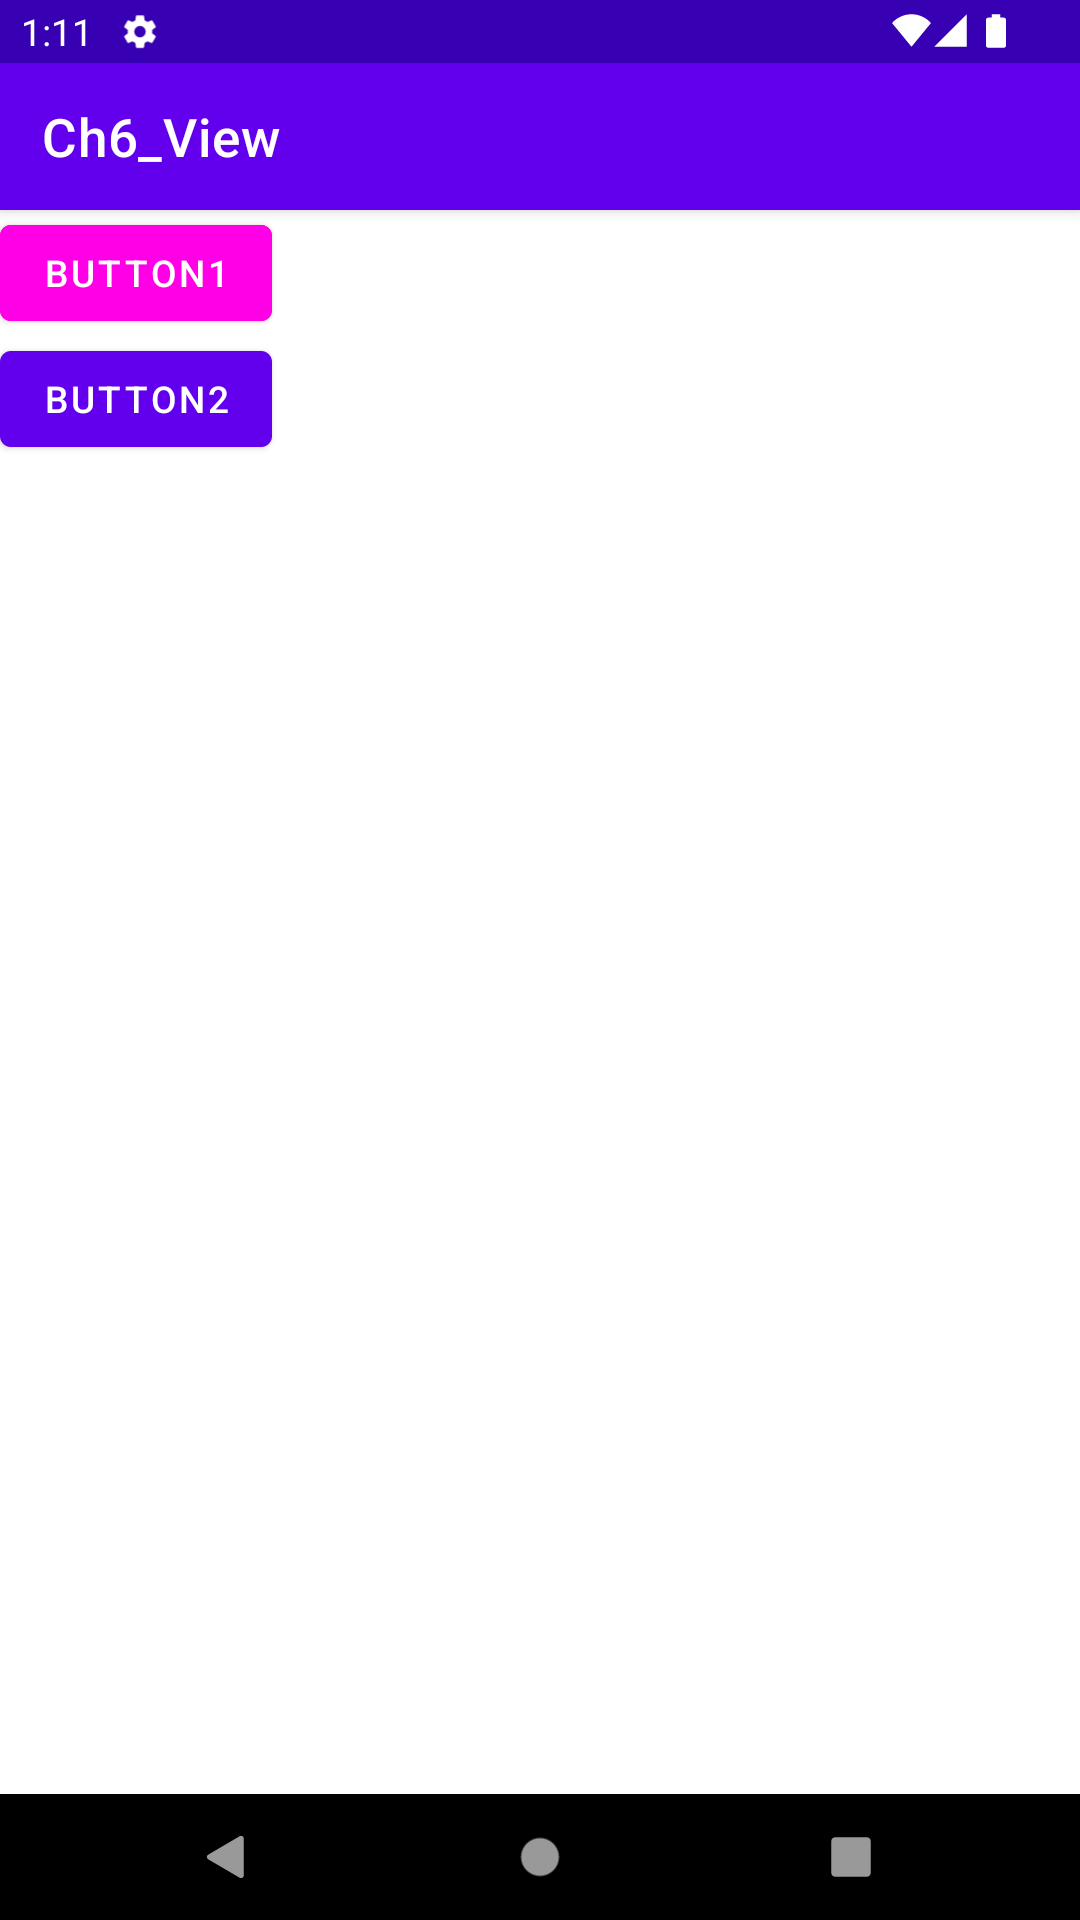
<?xml version="1.0" encoding="utf-8"?>
<LinearLayout xmlns:android="http://schemas.android.com/apk/res/android"
    android:layout_width="match_parent"
    android:layout_height="match_parent"
    android:orientation="vertical">

    <Button
        android:layout_width="wrap_content"
        android:layout_height="wrap_content"
        android:text="BUTTON1"
        android:backgroundTint="#FF00E6" />
    <Button
        android:layout_width="wrap_content"
        android:layout_height="wrap_content"
        android:text="BUTTON2" />

</LinearLayout>
LinearLayout 실습 (버튼 2개) 예제

<?xml version="1.0" encoding="utf-8"?>
<LinearLayout xmlns:android="http://schemas.android.com/apk/res/android"
    android:layout_width="match_parent"
    android:layout_height="match_parent"
    android:orientation="horizontal">

    <Button
        android:layout_width="wrap_content"
        android:layout_height="wrap_content"
        android:text="BUTTON1"
        android:backgroundTint="#FF00E6"
        android:layout_weight="1"/>
    <Button
        android:layout_width="wrap_content"
        android:layout_height="wrap_content"
        android:text="BUTTON2" />

</LinearLayout>
LinearLayout & layout_weight속성 실습 (버튼 2개) 예제

<?xml version="1.0" encoding="utf-8"?>
<LinearLayout xmlns:android="http://schemas.android.com/apk/res/android"
    android:layout_width="match_parent"
    android:layout_height="match_parent"
    android:orientation="horizontal">

    <Button
        android:layout_width="wrap_content"
        android:layout_height="wrap_content"
        android:text="BUTTON1"
        android:backgroundTint="#FF00E6"
        android:layout_weight="1"/>
    <Button
        android:layout_width="wrap_content"
        android:layout_height="wrap_content"
        android:text="BUTTON2"
        android:layout_weight="3"/>

</LinearLayout>
LinearLayout & layout_weight속성 실습 (버튼 2개) 예제2

<?xml version="1.0" encoding="utf-8"?>
<LinearLayout xmlns:android="http://schemas.android.com/apk/res/android"
    android:layout_width="match_parent"
    android:layout_height="match_parent"
    android:orientation="vertical">

    <LinearLayout
        android:layout_width="match_parent"
        android:layout_height="wrap_content"
        android:orientation="horizontal">
        <Button
            android:layout_width="wrap_content"
            android:layout_height="wrap_content"
            android:text="BUTTON1"
            android:backgroundTint="#FF00E6"
            android:layout_weight="1"/>
        <Button
            android:layout_width="wrap_content"
            android:layout_height="wrap_content"
            android:text="BUTTON2"
            android:layout_weight="3"/>
    </LinearLayout>

    <Button
        android:layout_width="match_parent"
        android:layout_height="wrap_content"
        android:text="BUTTON3"
        android:backgroundTint="#FF00E6"
        android:layout_weight="1"/>
    <Button
        android:layout_width="match_parent"
        android:layout_height="wrap_content"
        android:text="BUTTON4"/>

</LinearLayout>
중첩된 레이아웃에서 여백 채우기 예제

<?xml version="1.0" encoding="utf-8"?>
<LinearLayout xmlns:android="http://schemas.android.com/apk/res/android"
    android:layout_width="match_parent"
    android:layout_height="match_parent"
    android:orientation="vertical">

    <Button
        android:layout_width="match_parent"
        android:layout_height="0dp"
        android:layout_weight="1"
        android:text="BUTTON1"
        android:backgroundTint="#FF00E6"/>
    <Button
        android:layout_width="match_parent"
        android:layout_height="0dp"
        android:layout_weight="1"
        android:text="BUTTON2"/>
    <Button
        android:layout_width="match_parent"
        android:layout_height="0dp"
        android:layout_weight="1"
        android:text="BUTTON3"
        android:backgroundTint="#FF00E6"/>
</LinearLayout>
여백 채우기로 뷰의 크기 설정하기 예제

<?xml version="1.0" encoding="utf-8"?>
<LinearLayout xmlns:android="http://schemas.android.com/apk/res/android"
    android:layout_width="match_parent"
    android:layout_height="match_parent"
    android:orientation="vertical">

    <TextView
        android:layout_width="150dp"
        android:layout_height="150dp"
        android:background="#FFFF00"
        android:textSize="15dp"
        android:textStyle="bold"
        android:textColor="#FFFFFF"
        android:text="HelloWorld"
        android:gravity="right|bottom"
        android:layout_gravity="center_horizontal" />

</LinearLayout>
gravity, layout_gravity 속성 예제

<?xml version="1.0" encoding="utf-8"?>
<LinearLayout xmlns:android="http://schemas.android.com/apk/res/android"
    android:layout_width="match_parent"
    android:layout_height="match_parent"
    android:orientation="vertical"
    android:gravity="center">

    <TextView
        android:layout_width="150dp"
        android:layout_height="150dp"
        android:background="#FF0000"
        android:textSize="15dp"
        android:textStyle="bold"
        android:textColor="#FFFFFF"
        android:text="HelloWorld"
        android:gravity="right|bottom" />

</LinearLayout>
LinearLayout , gravity 속성 예제2

RelativeLayout
- 상대 위치로 배치
- 상대 뷰의 위치를 기준으로 정렬하는 레이아웃
▶android:layout_above: 기준 뷰의 위쪽에 배치
▶android:layout_below: 기준 뷰의 아래쪽에 배치
▶android:layout_toLeftOf: 기준 뷰의 왼쪽에 배치
▶android:layout_toRightOf: 기준 뷰의 오른쪽에 배치
- 상대 뷰의 어느 쪽에 맞춰서 정렬할지를 정하는 속성
▶android:layout_alignTop: 기준 뷰와 위쪽을 맞춤
▶android:layout_alignBottom: 기준 뷰와 아래쪽을 맞춤
▶android:layout_alignLeft: 기준 뷰와 왼쪽을 맞춤
▶android:layout_alignRight: 기준 뷰와 오른쪽을 맞춤
▶android:layout_alignBaseline: 기준 뷰와 텍스트 기준선을 맞춤
- 상위 레이아웃을 기준으로 맞춤 정렬하는 속성
▶android:layout_alignParentTop: 부모의 위쪽에 맞춤
▶android:layout_alignParentBottom: 부모의 아래쪽에 맞춤
▶android:layout_alignParentLeft: 부모의 왼쪽에 맞춤
▶android:layout_alignParentRight: 부모의 오른쪽에 맞춤
▶android:layout_centerHorizontal: 부모의 가로 방향 중앙에 맞춤
▶android:layout_centerVertical: 부모의 세로 방향 중앙에 맞춤
▶ android:layout_centerInParent: 부모의 가로·세로 중앙에 맞춤
<?xml version="1.0" encoding="utf-8"?>
<RelativeLayout xmlns:android="http://schemas.android.com/apk/res/android"
    android:layout_width="match_parent"
    android:layout_height="match_parent">

    <ImageView
        android:id="@+id/testImage"
        android:layout_width="150dp"
        android:layout_height="150dp"
        android:src="@drawable/mallang"
        android:padding="10dp"/>

    <Button
        android:layout_width="wrap_content"
        android:layout_height="wrap_content"
        android:textColor="#B6B6B6"
        android:text="Hahee"
        android:layout_toRightOf="@+id/testImage"/>

</RelativeLayout>
RelativeLayout 배치 규칙 예제

<?xml version="1.0" encoding="utf-8"?>
<RelativeLayout xmlns:android="http://schemas.android.com/apk/res/android"
    android:layout_width="match_parent"
    android:layout_height="match_parent">

    <ImageView
        android:id="@+id/testImage"
        android:layout_width="150dp"
        android:layout_height="150dp"
        android:src="@drawable/mallang"
        android:padding="10dp"/>

    <Button
        android:layout_width="wrap_content"
        android:layout_height="wrap_content"
        android:textColor="#B6B6B6"
        android:text="Hahee"
        android:layout_toRightOf="@+id/testImage"
        android:layout_alignBottom="@+id/testImage"/>

</RelativeLayout>
맞춤 정렬하는 align 속성 예제

<?xml version="1.0" encoding="utf-8"?>
<RelativeLayout xmlns:android="http://schemas.android.com/apk/res/android"
    android:layout_width="match_parent"
    android:layout_height="match_parent">

    <ImageView
        android:id="@+id/testImage"
        android:layout_width="150dp"
        android:layout_height="150dp"
        android:src="@drawable/mallang"
        android:padding="10dp"/>

    <Button
        android:layout_width="wrap_content"
        android:layout_height="wrap_content"
        android:textColor="#B6B6B6"
        android:text="Hahee"
        android:layout_alignBottom="@+id/testImage"
        android:layout_alignParentRight="true" />

</RelativeLayout>
레이아웃을 기준으로 맞춤 정렬하는 속성에 대한 예제

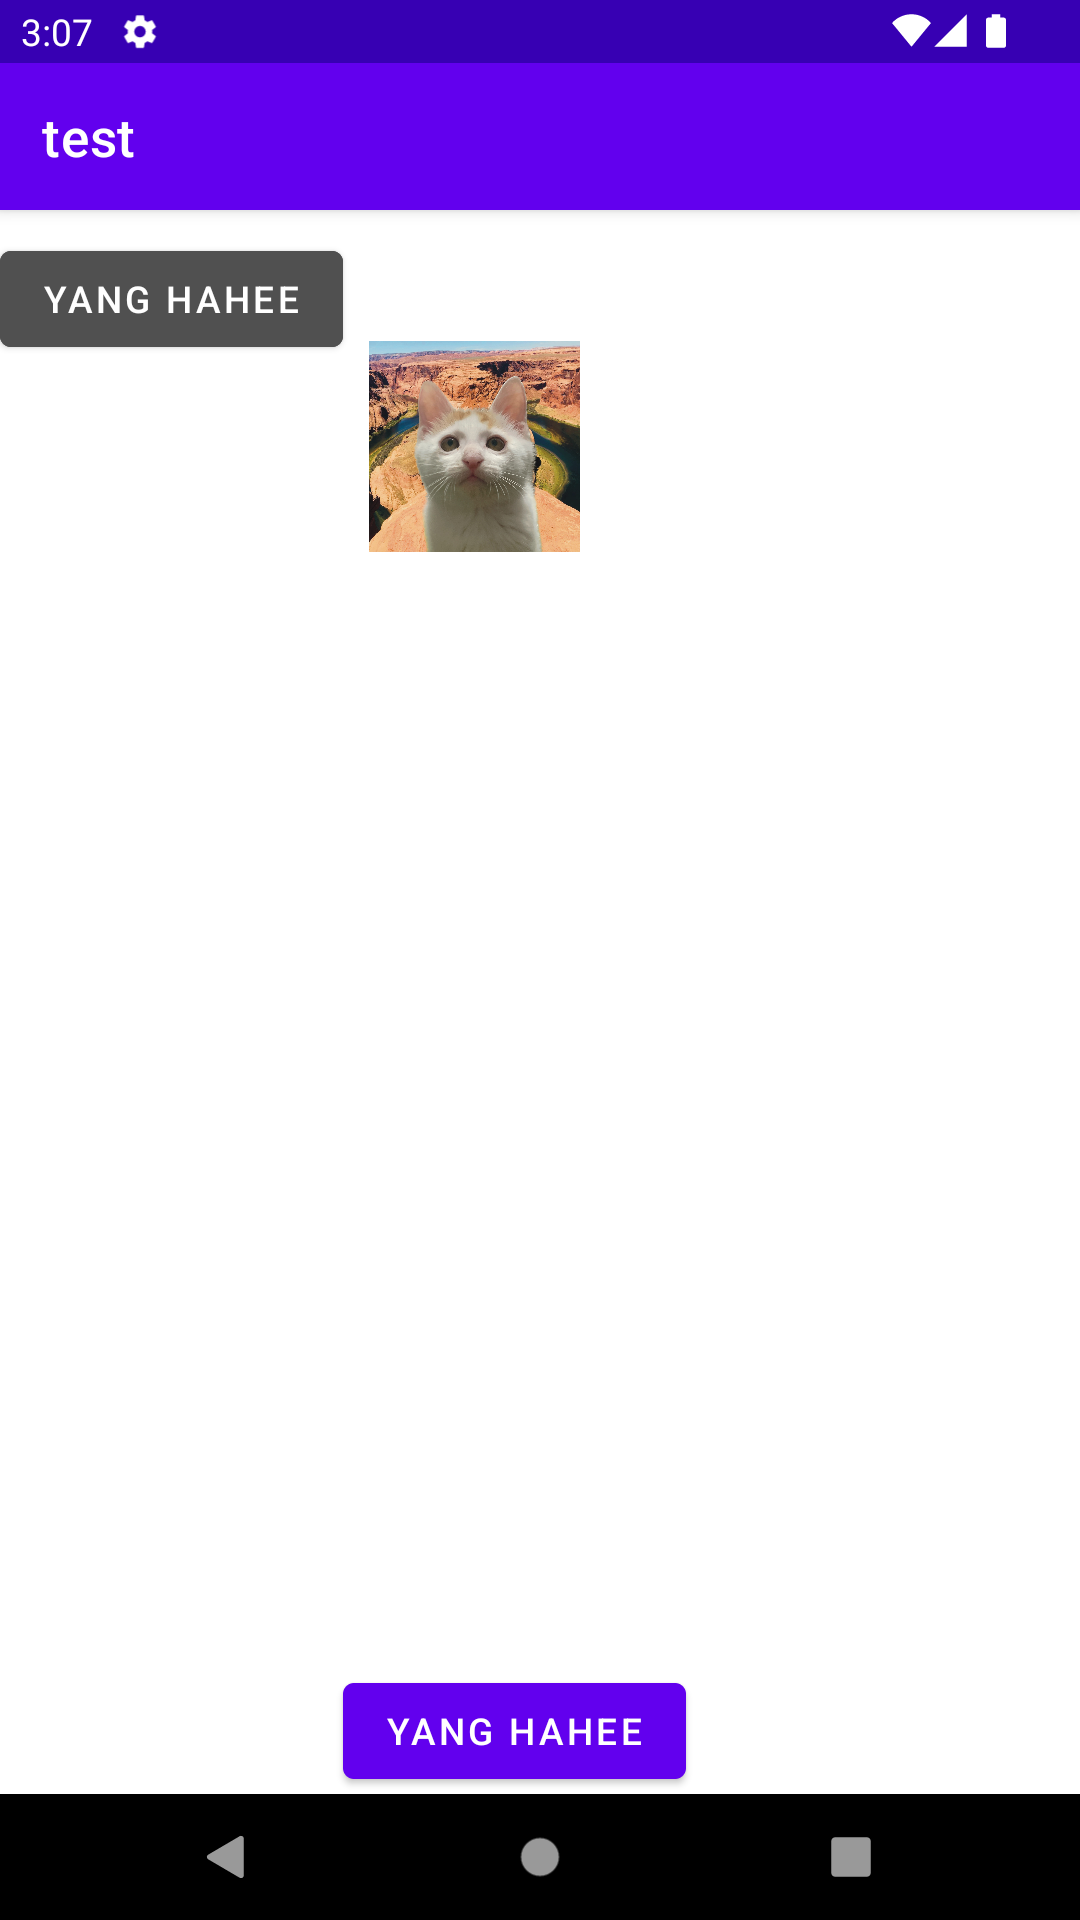
<?xml version="1.0" encoding="utf-8"?>
<RelativeLayout xmlns:android="http://schemas.android.com/apk/res/android"
    android:layout_width="match_parent"
    android:layout_height="match_parent">

    <Button
        android:id="@+id/btn1"
        android:layout_width="wrap_content"
        android:layout_height="wrap_content"
        android:backgroundTint="#505050"
        android:layout_marginTop="10dp"
        android:text="Yang Hahee" />

    <ImageView
        android:id="@+id/testImage"
        android:layout_width="100dp"
        android:layout_height="100dp"
        android:src="@drawable/mallang"
        android:layout_toRightOf="@+id/btn1"
        android:layout_alignBaseline="@+id/btn1"
        android:padding="10dp" />

    <Button
        android:layout_width="wrap_content"
        android:layout_height="wrap_content"
        android:text="Yang Hahee"
        android:layout_toRightOf="@+id/btn1"
        android:layout_alignParentBottom="true" />

</RelativeLayout>
테스트

FrameLayout
- 겹쳐서 배치
- 카드를 쌓듯이 뷰를 추가한 순서대로 위에 겹쳐서 계속 출력하는 레이아웃
- 대부분 뷰의 표시 여부를 설정하는 visibility 속성을 함께 사용
GridLayout
- 표 형태로 배치
- 테이블 화면을 만드는 레이아웃
- orientation 속성으로 가로나 세로 방향으로 뷰를 나열
- 줄바꿈을 자동으로 해줍니다.
▶orientation: 방향 설정
▶rowCount: 세로로 나열할 뷰 개수
▶columnCount: 가로로 나열할 뷰 개수
- 특정 뷰의 위치 조정하기
▶layout_row: 뷰가 위치하는 세로 방향 인덱스
▶layout_column: 뷰가 위치하는 가로 방향 인덱스
- 특정 뷰의 크기 확장하기
▶layout_gravity 속성을 이용
- 열이나 행 병합하기
▶layout_columnSpan: 가로로 열 병합
▶layout_rowSpan: 세로로 행 병합
<?xml version="1.0" encoding="utf-8"?>
<GridLayout xmlns:android="http://schemas.android.com/apk/res/android"
    android:layout_width="match_parent"
    android:layout_height="match_parent"
    android:orientation="horizontal"
    android:columnCount="3" >

    <Button android:text="A" />
    <Button android:text="B" />
    <Button android:text="C" />
    <Button android:text="D" />
    <Button android:text="E" />

</GridLayout>
GridLayout 배치규칙 예제1

<?xml version="1.0" encoding="utf-8"?>
<GridLayout xmlns:android="http://schemas.android.com/apk/res/android"
    android:layout_width="match_parent"
    android:layout_height="match_parent"
    android:orientation="vertical"
    android:rowCount="3" >

    <Button android:text="A" />
    <Button android:text="B" />
    <Button android:text="C" />
    <Button android:text="D" />
    <Button android:text="E" />

</GridLayout>
GridLayout 배치규칙 예제2

<?xml version="1.0" encoding="utf-8"?>
<GridLayout xmlns:android="http://schemas.android.com/apk/res/android"
    android:layout_width="match_parent"
    android:layout_height="match_parent"
    android:orientation="horizontal"
    android:columnCount="3" >

    <Button android:text="A" />
    <Button android:text="B" />
    <Button android:text="C"
        android:layout_row="1"
        android:layout_column="1" />
    <Button android:text="D" />
    <Button android:text="E" />

</GridLayout>
grid layout &layout_row, layout_column 뷰 위치 조정 예제

<?xml version="1.0" encoding="utf-8"?>
<GridLayout xmlns:android="http://schemas.android.com/apk/res/android"
    android:layout_width="match_parent"
    android:layout_height="match_parent"
    android:orientation="horizontal"
    android:columnCount="3" >

    <Button android:text="A" />
    <Button android:text="HELLO WORLD HELLOWORLD" />
    <Button android:text="C" />
    <Button android:text="D" />
    <Button android:text="E"
        android:layout_gravity="fill_horizontal" />
    <Button android:text="F" />

</GridLayout>
grid layout & layout_gravity 속성 특정 뷰의 크기 확장 예제1

<?xml version="1.0" encoding="utf-8"?>
<GridLayout xmlns:android="http://schemas.android.com/apk/res/android"
    android:layout_width="match_parent"
    android:layout_height="match_parent"
    android:orientation="horizontal"
    android:columnCount="3" >

    <Button android:text="A" />
    <Button android:text="HELLO WORLD HELLOWORLD" />
    <Button android:text="C" />
    <Button android:text="D" />
    <Button android:text="E" />
    <Button android:text="F"
        android:layout_row="1"
        android:layout_column="1"
        android:layout_gravity="right" />

</GridLayout>
grid layout & layout_gravity 속성 특정 뷰의 크기 확장 예제2

grid layout 열이나 행 병합 layout_columnSpan, layout_rowSpan 예제
ConstraintLayout
- 계층 구조로 배치
'Mobile > Android Studio' 카테고리의 다른 글
| 안드로이드 #6 : 전화걸기 화면에서 숫자누르기, back버튼, #(리셋) 기능 추가(이벤트 실습) 230303 (0) | 2023.03.03 |
|---|---|
| 안드로이드 #5 : 전화걸기 화면 만들어보기(레이아웃 실습) 230303 (0) | 2023.03.03 |
| 안드로이드 #3 : 뷰 바인딩 230228 (0) | 2023.03.02 |
| 안드로이드 #2 : 뷰 클래스(TextView, ImageView, EditText, CheckBox, RadioButton, Button) 230228 (0) | 2023.02.28 |
| 안드로이드 #1 : 안드로이드 기초, 기본설정, 출력해보기 230227 (0) | 2023.02.27 |


댓글